For the 12 month pattern I used a third of the width of fabric for the width of the dress cutting out the armholes according to the pattern (basically a 4" long "J" shape), and half of the width of fabric for the size 6/7 dress and a 5" armhole. After cutting out the material I serged the two side seams.
Next, iron the armhole raw edges under twice. I tried to make this very narrow1/4" hem.) Sew the edges down.
Next iron/sew the elastic casing. I normally use 3/4" elastic, so just be sure the elastic has plenty of room to seat flat in the casing.
Cut out the straps and front flat. I made the front flap the width of the casing and about 5" tall. The straps I cut about 13" long and 2.25" wide. Fold each strap in half lengthwise and sew down the side seam. Fold the front flap in half lengthwise, but leave a 1' opening on the top center of the strip. Sew on all three sides leaving the center open.
Flip strapes and front flap right side out and iron. Use a poker or blunt side of a pair of scissors to put out the seams. Make sure the seam on the straps is running down the center back of the straps.
To add the front flap I pinned the rectangle with the opening towards the dress. I placed the flap on top of the casing and pinned in place. I pulled back the flap in the picture to show you how slight the overlap is.
To thread the elastic you will need a safety pin and plenty of elastic. The straps and front and back casing are filled with elastic. I have made pillow case dresses by using ribbon and have found that elastic holds better than the ribbon and keeps the shape of the outfit.
I don't like to cut elastic to a certain length when sewing. I buy my elastic in bulk and don't like to leave extra throw away pieces. To avoid this I threaded the elastic through a strap, the front casing, a strap and then the back casing. It makes a circle of elastic. Then I start on the back casing and pin the end of the elastic to the end to keep it from coming loose. Work with the opposite end of the casing and wrap the strap around the elastic and sew it stationary. Then allow the elastic to spring back in the casing. Push it in if needed Once the strap ends are no longer showing sew down the casing securing the strap in the casing. I followed my armhole stitching to make it look neat and put together. I continued this method around the dress.
Once I was back to where I started, I unhooked the safety pin and pulled the elastic out of the casing enough to sew it to the strap elastic. Trim any elastic past the seam to avoid bulkiness. To finish I pushed this seam back into the casing and secured with a straight stitch just like the others.
To finish the top I did a blind stitch shown below to attach the front flap to the armhole seams.
To finish the dress I used my ruffler to make a pleated ruffle to go around the bottom of the 12 month dress and a solid green stripe to sew around the bottom of the 6/7 dress.
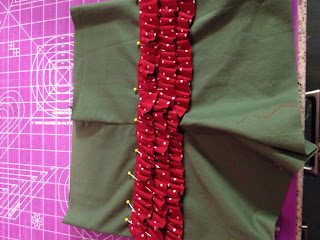
I was hoping that the 12month top would be more shirt length than dress length so you could see the cute bloomers I made to go with the outfit. I just attached three layers of pleated material on the rear making them barely overlap.
I had some extra material left over and really want to make the girls a doll dress using the Oliver + S popover doll pattern. I used the pattern for a birthday top for a friend's daughter and fell in love with the pattern! Can't wait to post a picture of both girls with their matching doll dresses.


0 comments:
Post a Comment